













How to Properly Set Up Your Computer Microphone
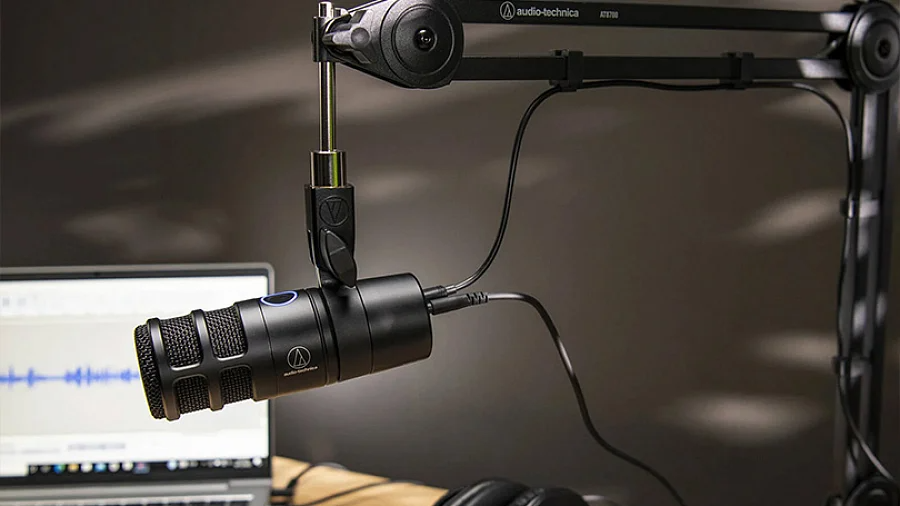
Today, everyone needs a mic: for work calls, voice chats in online games, streaming, video recording, and even voice-to-text input. Your equipment must work flawlessly — especially when the impression you make in a meeting or broadcast depends entirely on your audio quality.
In this article, we’ll break everything down step-by-step: how to connect your microphone correctly, set it up in Windows and macOS, select the right device in popular applications, and what to do if things go wrong.
Contents
- Where to Plug the Microphone into the Computer
- How to Connect a Wireless Microphone
- How to Set Up a Microphone in Windows
- How to Set Up a Microphone in macOS
- Setting Up the Microphone for Specific Programs
- Microphone Positioning: How to Achieve Clear Sound
- Summary and Recommendations
- Frequently Asked Questions
Where to Plug the Microphone into the Computer
Before setting anything up, you must connect it properly. Most microphones use one of three connection types:
- USB: The most convenient option. Simply plug the cable into a port, and the system automatically recognizes the device. This type of microphone doesn't require a sound card and is perfect for work, podcasts, and streaming.
- 3.5 mm TRS (Mini-jack): An analog connector. Pay attention to the port: laptops often have a combined headphone/microphone jack (TRRS). If you have separate jacks for a microphone and headphones, look for the pink port with a microphone icon.
- Combined Jack (TRRS): Used for headsets. A single plug transmits both sound and voice. If your microphone isn’t detected, double-check that you are using the correct port.
Your choice of connector largely dictates the subsequent setup, so ensure the physical connection is correct before diving into system settings.
How to Connect a Wireless Microphone
Wireless microphones and headsets operate via Bluetooth. While convenient, this requires a few extra steps compared to a wired connection:
- Enter Pairing Mode: First, put the microphone into pairing mode. Usually, this involves holding the power button for 3–5 seconds until the indicator light starts flashing. The exact method will be outlined in your model's manual.
- Connect in System Settings:
- Windows: Go to Start → Settings → Bluetooth & devices → Add device.
- macOS: Go to System Settings → Bluetooth → Connect. Find your device name in the list and confirm the connection.
- Set as Default: An important detail: simply pairing the device does not mean the system has automatically selected it as your primary microphone. After connecting, you must go into your sound settings and manually select it as your input device — otherwise, the computer will continue using its built-in microphone.
Keep in mind that Bluetooth inherently adds a slight audio delay. For streaming or live performances, this delay can be noticeable. In such cases, a wired connection is always the better choice.
How to Set Up a Microphone in Windows
Even after connection, a microphone might not work correctly right away. Windows might not select it automatically or may set the volume level too low. Here’s how to fix that:
- Step 1. Open Sound Settings: Click Start → Settings → System → Sound. A faster way is to right-click the speaker icon in the system tray and select "Sound settings."
- Step 2. Select the Input Device: In the "Input" section, find the dropdown menu and select your microphone. If it’s not listed, check the connection or restart your computer.
- Step 3. Adjust the Volume Level: Click "Device properties" under your microphone’s name. You'll find a volume slider — the recommended setting is 70–80%. Too high, and you'll get noise and distortion; too low, and you'll be hard to hear.
- Step 4. Test the Microphone: Slightly below on the same page is a "Test your microphone" section. Speak into it, and the bar should react to your voice. If there is no reaction, return to Step 2.
- Step 5. Allow Apps Access to the Microphone: This is a very common reason why a microphone won't work in a specific program, even if the system is configured correctly. Go to Settings → Privacy & security → Microphone. Ensure that global access is enabled, find the specific app in the list, and toggle it to "On."
After completing these steps, test your microphone in a simple application, like the standard Windows "Voice Recorder."
How to Set Up a Microphone in macOS
On Apple computers, the microphone setup is slightly different, but the logic remains the same: select the device, check the levels, and grant app permissions.
- Step 1. Open Sound Settings: Click the Apple icon in the top-left corner → System Settings → Sound → "Input" tab.
- Step 2. Select the Microphone: Find your microphone in the list of input devices and click on it. The input level bar should react to your voice — if it moves, everything is connected correctly.
- Step 3. Adjust the Input Volume: Right below the device list is the "Input volume" slider. The optimal position is around 70–75%. You can also enable "Ambient noise reduction," which is especially useful if you are working in an echoey room or have background noise.
- Step 4. Allow App Access: In macOS, permissions are managed separately. Go to System Settings → Privacy & Security → Microphone. Find your required application — Zoom, Teams, Chrome — and enable access. Without this step, the microphone will not work in the program, even if your system settings are correct.
If the microphone doesn't appear in the list, try disconnecting and reconnecting it, or restart your Mac. If using a USB microphone, ensure the port is functioning properly.
Setting Up the Microphone for Specific Programs
Even if your microphone works at the system level, every application uses its own audio settings, which must be checked individually.
For example, to configure the microphone in Zoom: go to Settings → Audio → "Microphone" section. Select the required device from the list and click "Test Mic" to ensure it works. Here, you can also enable background noise suppression — a feature that significantly improves audio quality in noisy environments.
General Advice: After changing your microphone or updating your operating system, always check your application settings to ensure the correct device is selected — programs sometimes default back to the system microphone. A two-minute check will save you from an awkward silence at the start of an important meeting.
Microphone Positioning: How to Achieve Clear Sound
System settings are only half the battle. The physical placement of your microphone directly impacts recording quality. Here is what you need to pay attention to:
- Distance: The optimal distance from your lips to the microphone is 15–20 cm. Too close, and the sound will be overly thick with breath pops. Too far, and your voice will sound quiet and hollow.
- Direction: Most microphones have a directional polar pattern, meaning they pick up sound best from the front. Make sure you are speaking into the "active" side, not the side or back.
- Plosive Protection: "P" and "B" sounds create unpleasant pops. A pop filter or a foam windscreen solves this problem. A budget-friendly alternative is to speak slightly off-axis rather than directly into the capsule.
- Vibrations: If the microphone is sitting on a desk, it will pick up thumps and keyboard noise. Use a desktop stand with a shock mount, or put the microphone on a boom arm (pantograph) — this noticeably cleans up the sound.
Summary and Recommendations
Setting up a microphone comes down to a few clear steps: connect correctly → select the device in the system → set the levels → allow app access → check positioning. If you follow each of these sequentially, most problems can be solved effortlessly.
If you are just looking to buy a microphone or want to upgrade your audio quality, drop by the Dr.Head showroom in Dubai. Here, you can find a model tailored to your specific needs: for calls, streaming, or recording podcasts.
Frequently Asked Questions
- Do I need to install drivers for the microphone? For most USB microphones — no. Windows and macOS automatically recognize such devices without additional software. The exceptions are professional audio interfaces and certain wireless models, for which the manufacturer may provide proprietary drivers to expand configuration options. Check the manufacturer's official website for your specific device.
- Why do people hear an echo or their own voice during a call? This most often happens because your microphone is picking up sound from your speakers or headphones. The solution is to switch to closed-back headphones instead of speakers, or lower their volume. Also, check your sound settings to ensure the "Listen to this device" feature is turned off — this is specifically designed to route microphone audio to your playback device and is often enabled by accident.
- Can I connect a microphone to my computer using an adapter?
Yes, but with caveats. A 3.5 mm to USB adapter doesn't work correctly with all models — cheap options can introduce interference or not be detected by the system at all. If the microphone is designed for an analog connection, it's much better to use an external sound card. It will ensure a stable signal and clean audio without any unnecessary headaches.