


The Art of Balance: How to Set Anti-Skate on Your Turntable

It’s about time we talk about one of the most misunderstood dials on your turntable: the anti-skate. What does it actually do? Why should you care? And how do you set it right without a degree in physics? Let’s break it down.
Contents
What Exactly is Anti-Skate?
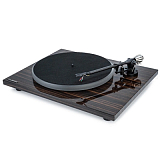
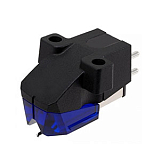
Think of your stylus (aka the needle) as a tiny race car taking a continuous, high-speed left turn down the groove of your record. Because of how the tonearm pivots and the friction of the spinning vinyl, there is a natural physical force constantly pulling the tonearm inward toward the center label. This is called "skating."
If you don't fight this inward pull, your needle gets slammed against the inner wall of the groove.
Anti-skate is exactly what it sounds like: a mechanic built into your turntable that applies a tiny, precisely calibrated outward push to counteract that inward pull. When you get it right, your stylus sits perfectly dead-center in the groove, reading both the left and right channels equally.
Why You Absolutely Can’t Ignore It
We are talking about microscopic forces, sure, but ignoring them will completely wreck your listening experience. If your anti-skate is set wrong (or turned off entirely), you are asking for trouble:
- Lopsided Sound: The inner wall of the groove usually carries the left audio channel. If the needle is pressed hard against it, your left speaker will sound noticeably louder and harsher, while the right channel gets muffled.
- Nasty Distortion: An off-center stylus struggles to read complex, loud musical passages. You will start hearing harsh, hissing distortion on vocal sounds like "S" and "Sh."
- Wrecked Records & Needles: Constant, uneven friction against one side of the groove will permanently carve away the vinyl, destroying your favorite albums. It also wears down one side of your diamond stylus unevenly, cutting its lifespan in half. Not cool.
- The Dreaded Skip: In extreme cases, a lack of anti-skate combined with a light tracking force will cause the needle to physically jump out of the groove and skate right across the record.
How to Set Anti-Skate
Before you touch the anti-skate dial, make sure your turntable is sitting on a perfectly level surface. Keep in mind that anti-skate is the very last step of your setup: you must balance your tonearm and set your VTF first.
The Golden Rule: Just Match It
For 95% of setups out there, this basic method is all you will ever need. Turntable manufacturers design their anti-skate dials to correspond directly with the tracking force.
- Check your VTF: Look up your cartridge manufacturer's specs and set the vertical tracking force using the tonearm counterweight.
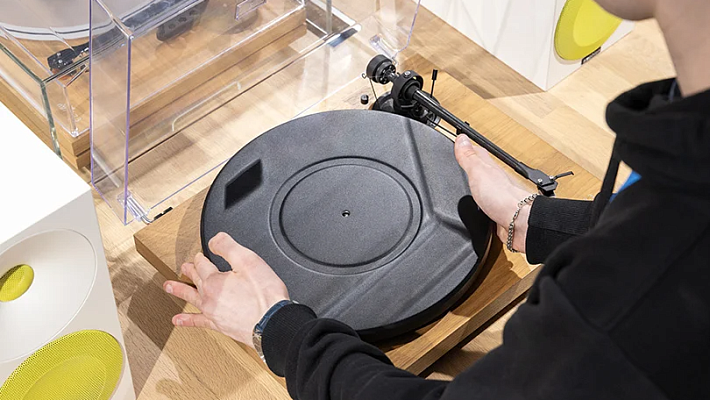
- Find the Dial: Locate the anti-skate wheel or slider. It is usually sitting right next to the base of the tonearm.
- Match the Number: Simply turn the anti-skate dial to match your VTF. If your tracking force is set to 1.8 grams, set the anti-skate to 1.8. Boom. You are done.
Trust, But Verify: Advanced Tuning
Want to get a little nerdy with it and ensure absolute perfection? Here are a few ways to test your setup:
- The Ear Test: Put on a record you know inside out, preferably one with a strong lead vocal mixed right in the dead-center. Close your eyes and listen. If the vocal feels pulled to the left, or you hear distortion in the left channel during loud parts, slightly increase the anti-skate. If the sound feels choked or pulls right, dial it back a bit.
- The Blank Vinyl Trick: Drop the needle on the smooth, grooveless "run-out" area near the record label. A perfectly dialed tonearm should stay pretty much still or drift incredibly slowly toward the center.
- Test Records: If you want zero guesswork, hardcore audiophiles use specialized calibration records featuring pure sine waves to dial in the balance perfectly.
Types of Anti-Skate Mechanisms
Not all turntables handle this outward push the same way. Here is a quick look at what might be under the hood of your deck:
- Spring: A small coiled spring pulls the tonearm outward. It is the most common design, simple and compact.
- Weight on a String: A tiny metal weight hangs from a fishing-line thread, pulling the tonearm backward over a notched lever. It’s very old-school, extremely reliable, and visually cool. You adjust it by moving the thread to a different notch.
- Magnetic: Two magnets repel each other to create a frictionless outward push. This is the premium option, highly consistent and completely immune to physical wear and tear.
Keep It Clean
A perfectly calibrated tonearm won't save you if your gear is filthy. Dust acts like a boulder on a race track.
Always use an anti-static carbon fiber brush on your records before dropping the needle. Clean your stylus regularly (brushing from back to front only!), and always store your vinyl vertically. Set your anti-skate properly, keep your wax clean, and your collection will reward you with incredible sound for decades.


Arrival: 202531
Performer: Lady Gaga
Genre: Electronic, Hip Hop, Pop

Arrival: 202552
Performer: Madonna
Genre: Electronic, Hip Hop, Pop

Arrival: 202537
Performer: Charli XCX
Genre: Electronic, Pop


Arrival: 202537
Performer: The Black Keys
Genre: Rock

Arrival: 202537
Performer: Sabrina Carpenter
Genre: Electronic, Pop


Arrival: 202430
Performer: Cigarettes After Sex
Type of performer: Foreign

Arrival: 202537
Performer: The Black Keys
Genre: Rock